Deploy Umami analytics with Launcher
I have recently moved my deployment solution to Launcher and I wanted to use it to deploy Umami in my server too. It involves a few steps.
Create a new site and set the Git repository to [email protected]:mikecao/umami.git, and branch master, and copy the new database credentials.
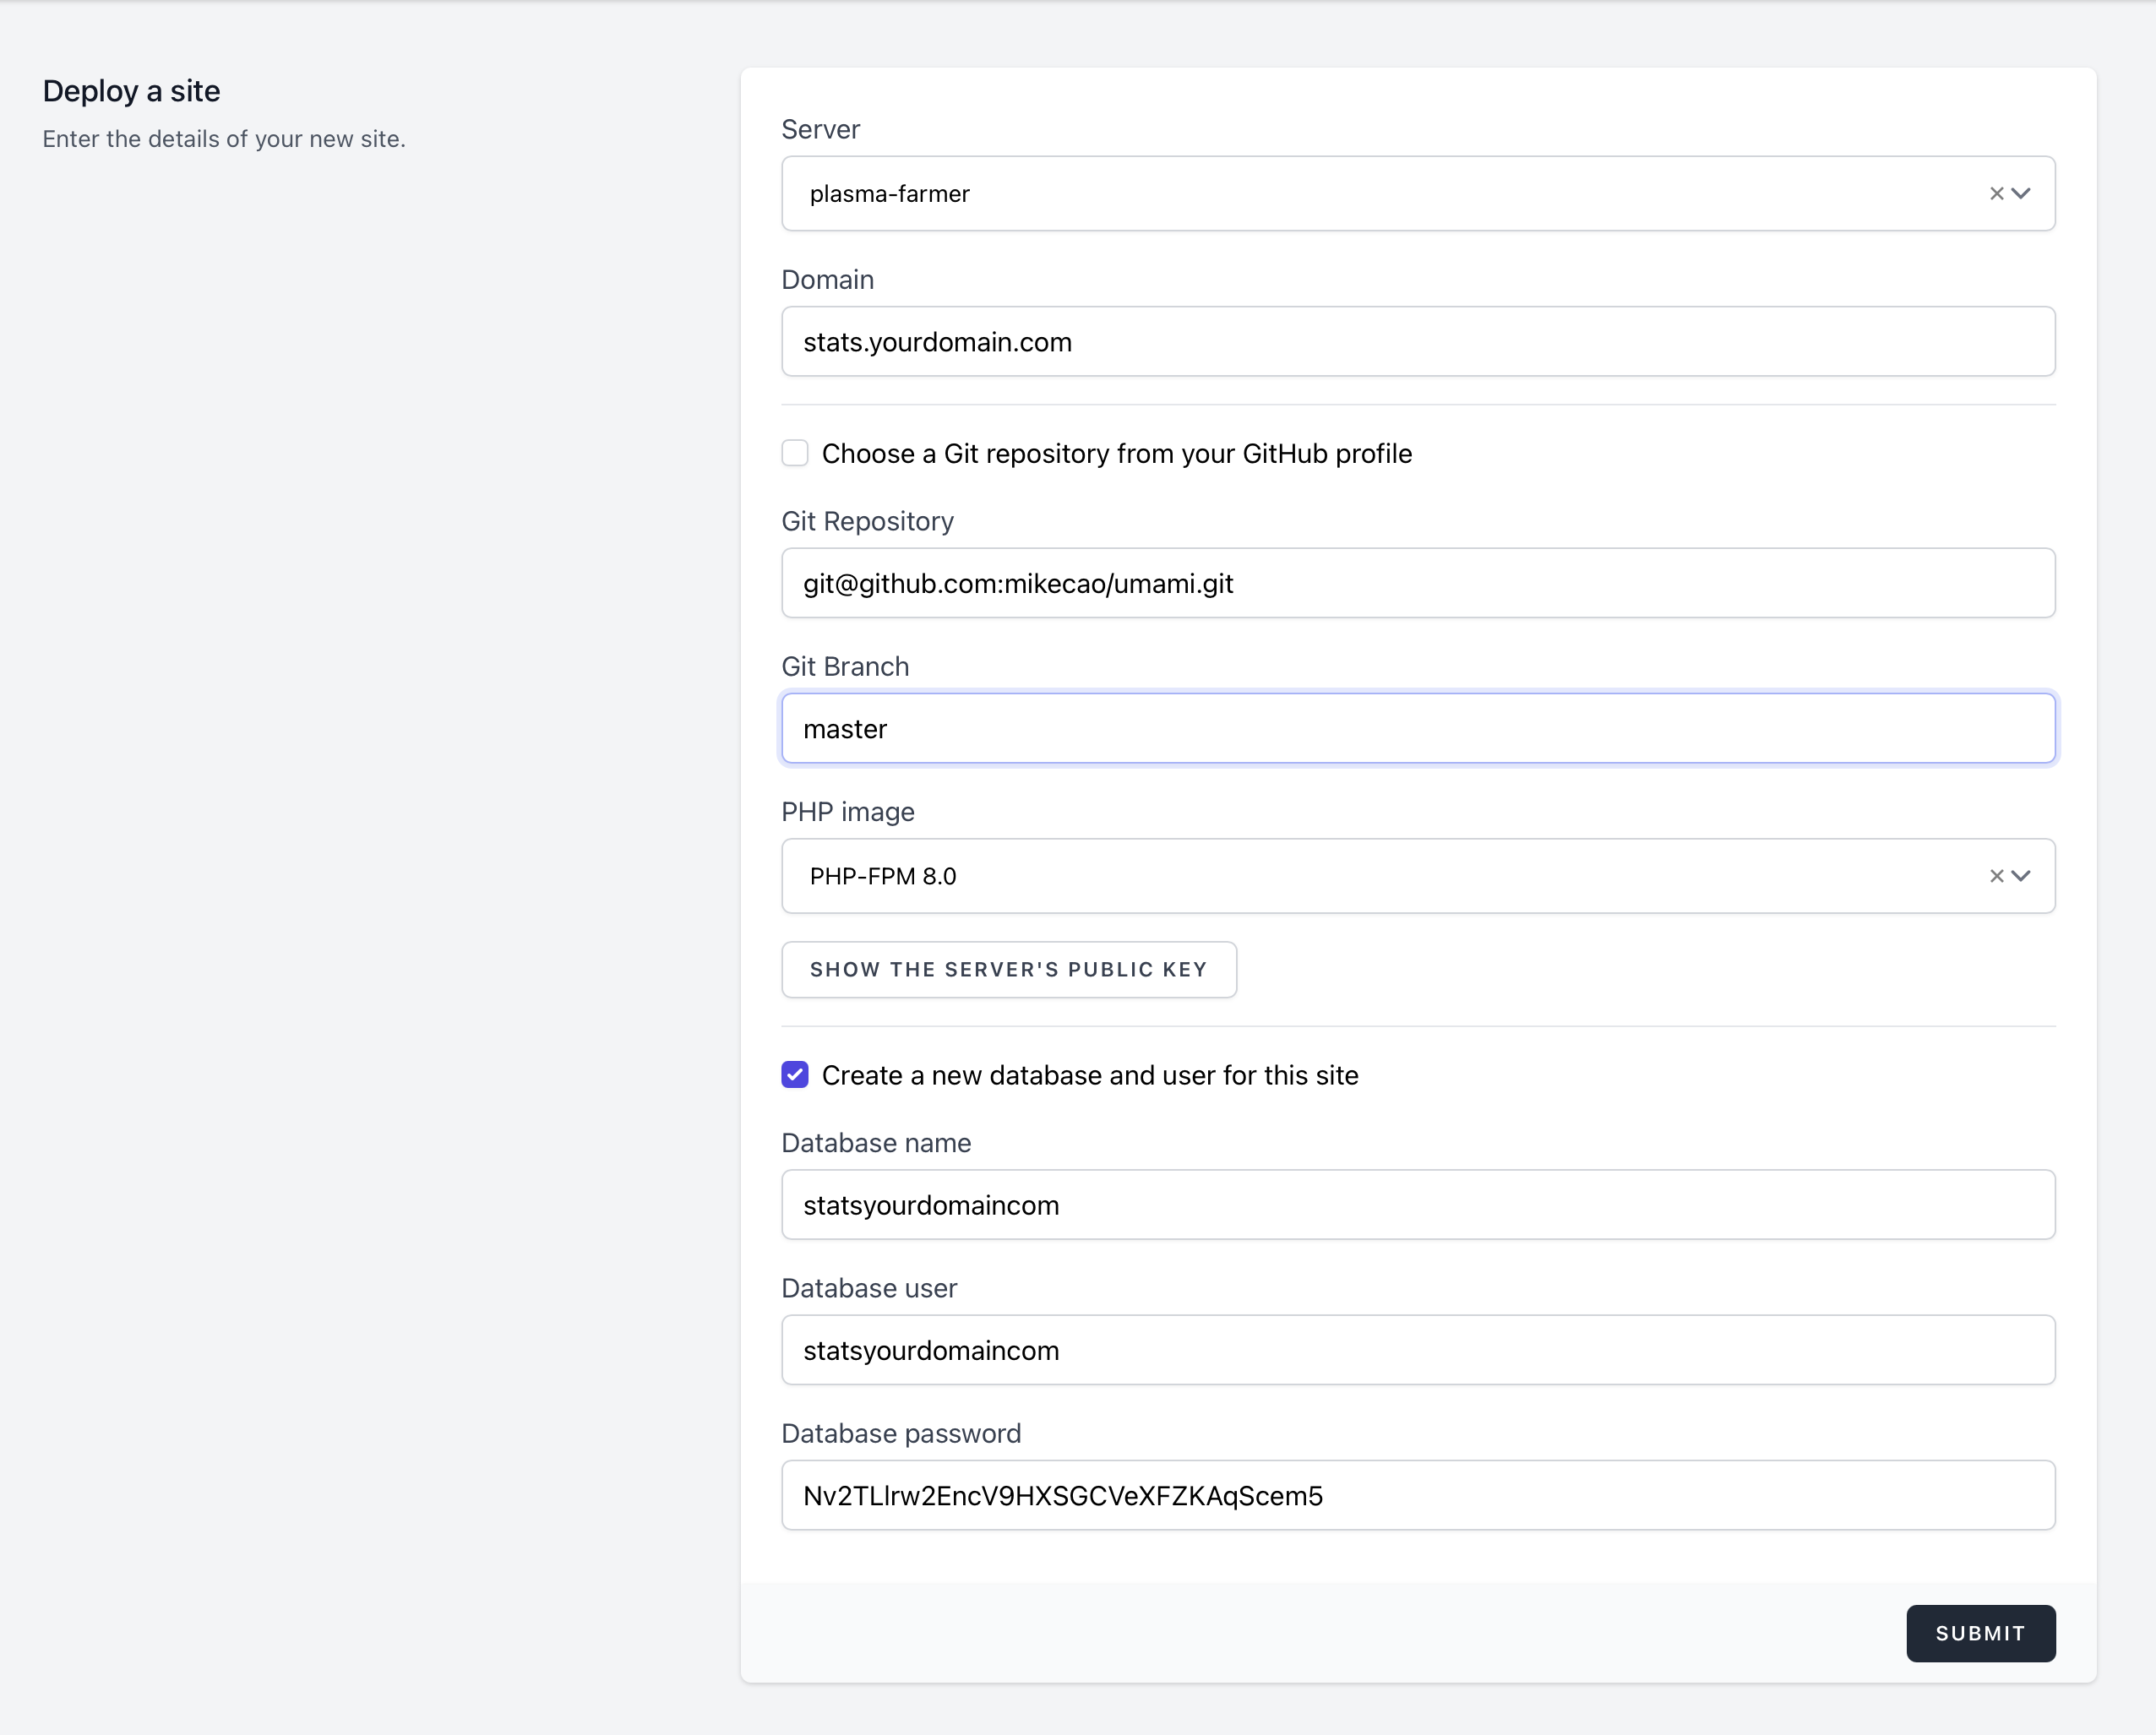
Edit the App .env file.
DATABASE_URL=mysql://USERNAME:PASSWORD@mysql-8:3306/statsyourdomaincomHASH_SALT=WzkHGhOkPkV5dQHwVmOXeJK7ro4uWL5ZReplacing USERNAME and PASSWORD with your generated database credentials, and RANDOMSTRING with a random string.
On macOS, you can use the following code to generate a random string of 32 characters.
cat /dev/urandom | tr -dc 'a-zA-Z0-9' | head -c 32Edit the Deploy script (entrypoint).
#!/bin/bash set -eux -o pipefailexport NODE_OPTIONS=--max-old-space-size=8192 echo "Git pull"git remote set-url origin $LAUNCHER_SITE_GIT_REPOSITORYgit pull origin $LAUNCHER_SITE_GIT_BRANCH if [ -f yarn.lock ]; then echo "Install yarn dependencies and build production assets" yarn install yarn run buildfi exec "$@"Edit the Dockerfile PHP-FPM to expose the port 3000 used for Umami.
# https://hub.docker.com/u/uselauncher/php-fpm-80# https://github.com/uselauncher/php-fpm-80 FROM uselauncher/php-fpm-80 # Uncomment the two lines below to install additional PHP extensions# See: https://github.com/mlocati/docker-php-extension-installer # USER root# RUN install-php-extensions ldap USER launcher EXPOSE 3000Deploy your stats.yourdomain.com site.

Create a daemon with the following command.
yarn --cwd /app startSSH into container to get the daemon container name.
ssh launcher@YOURSERVERIP -t 'sudo docker ps'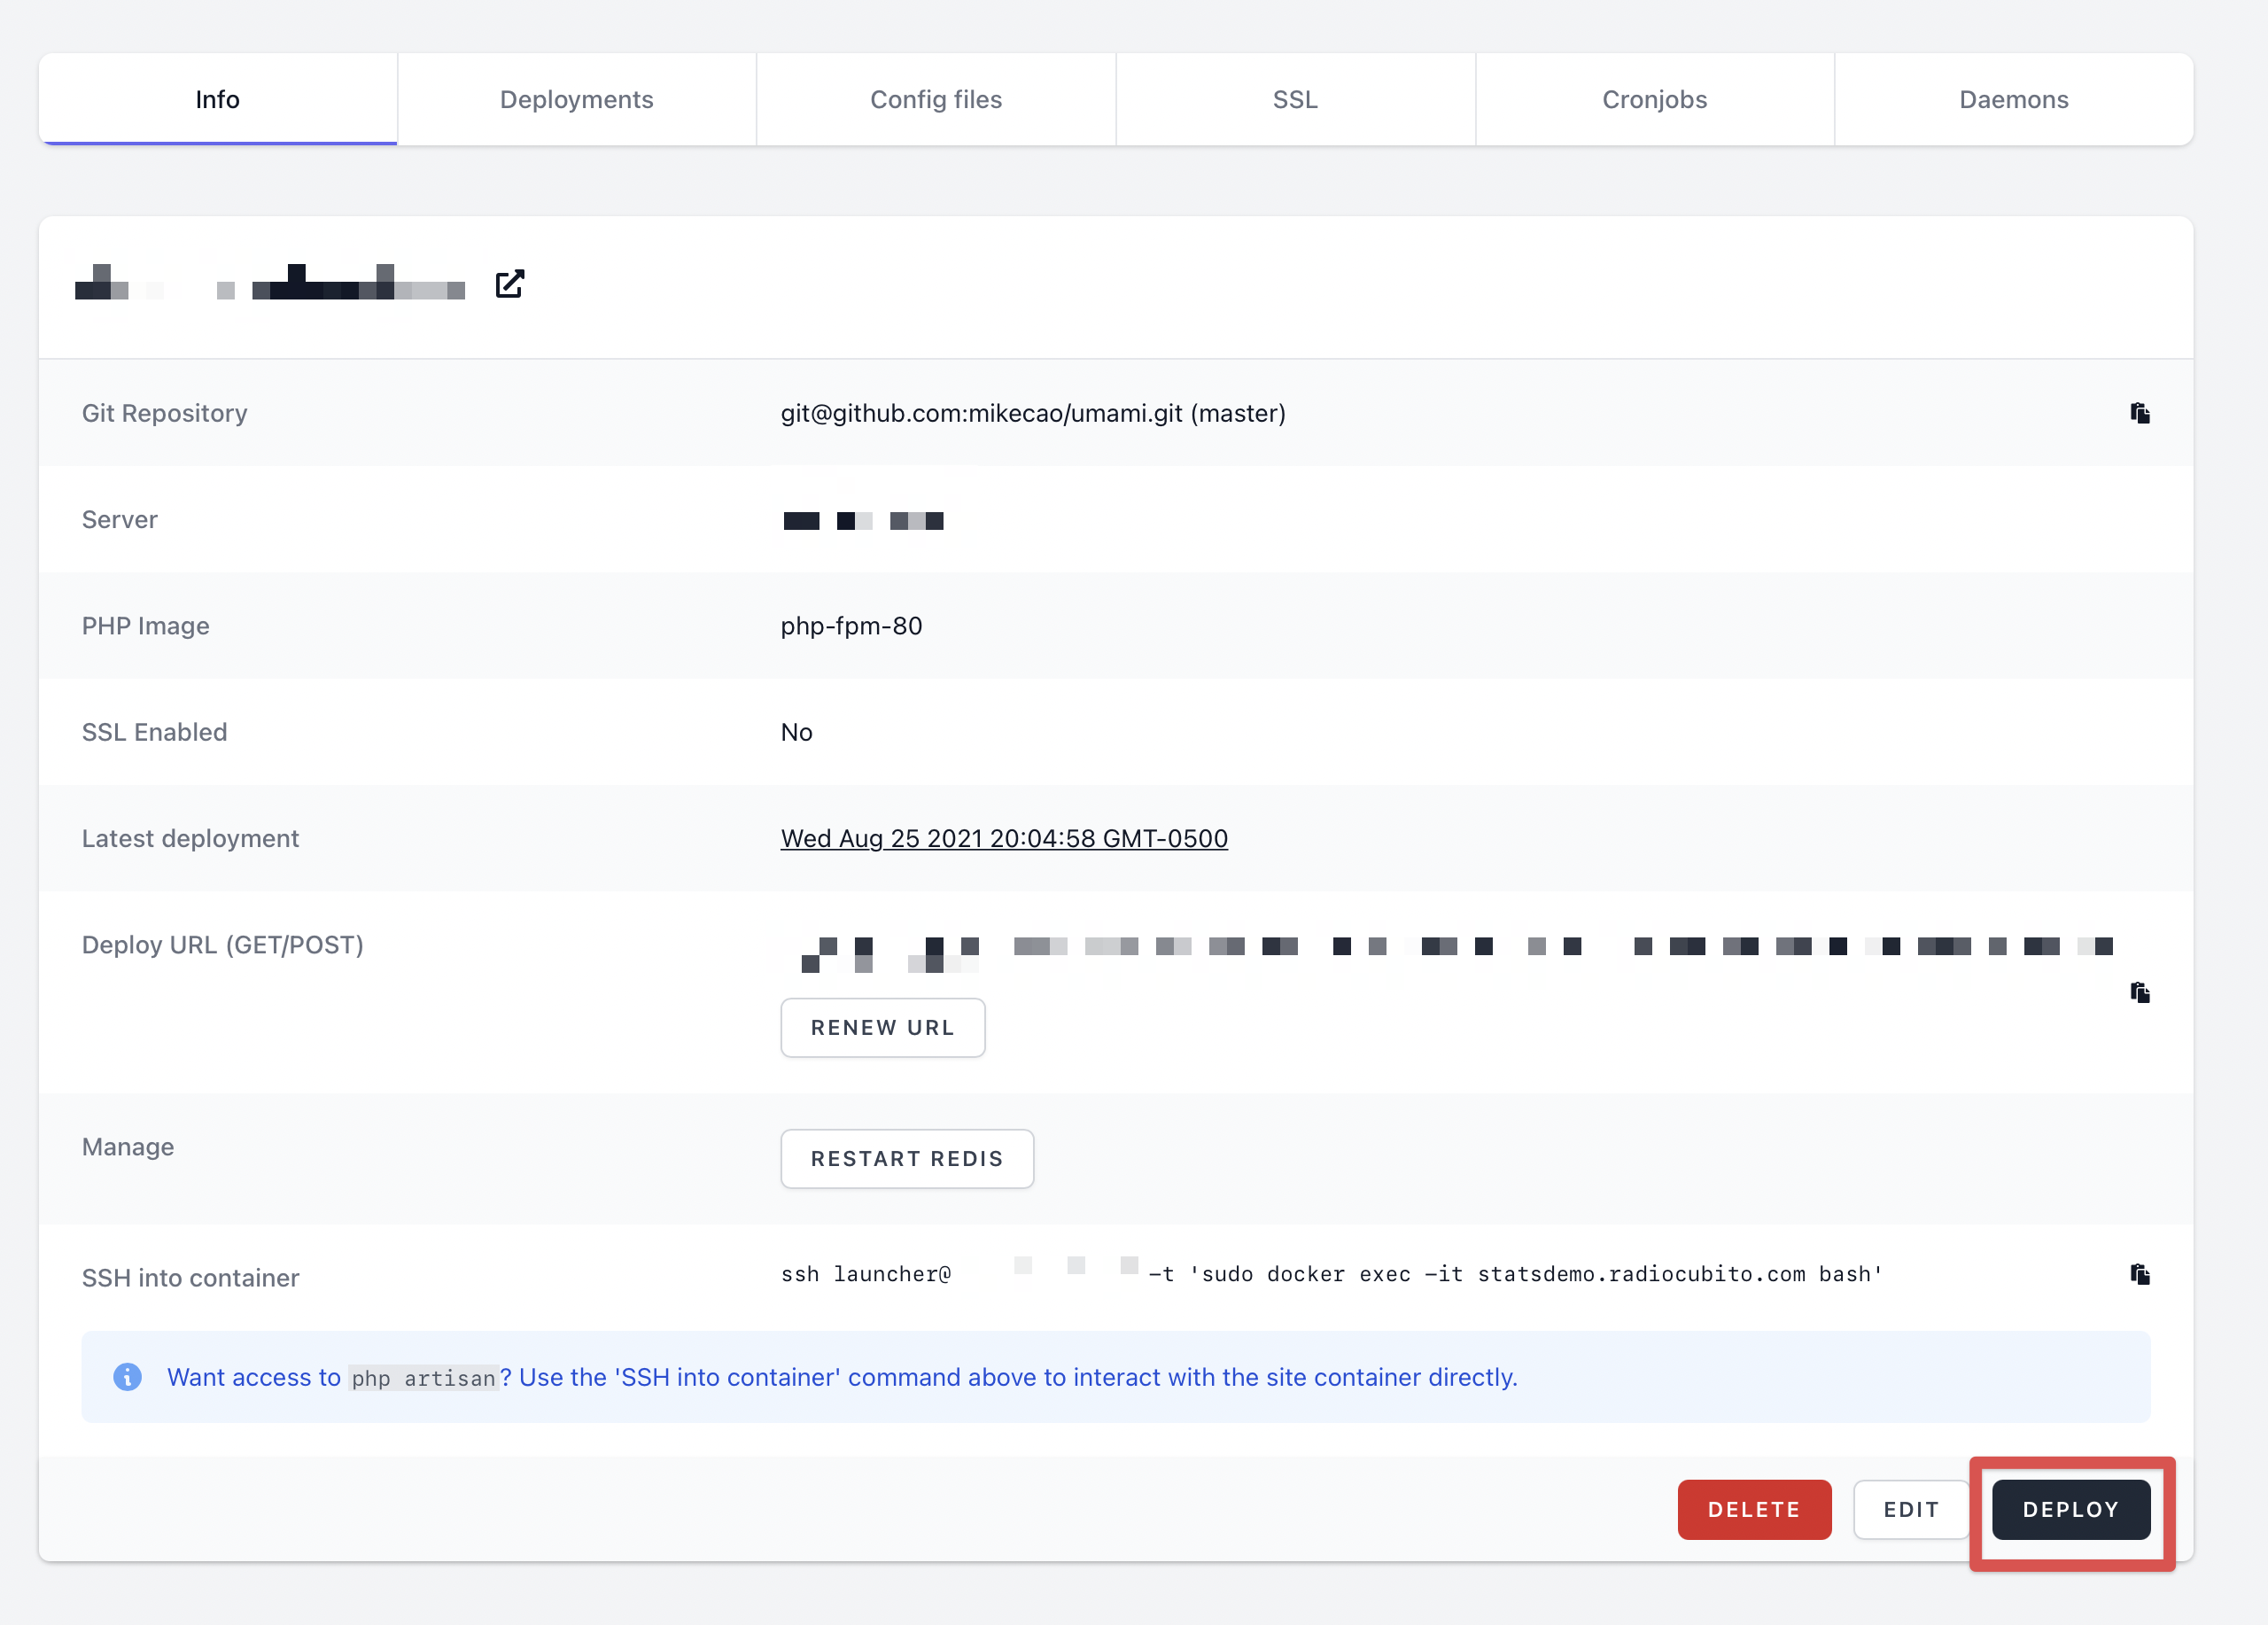
SSH into container to get the daemon container IP address.
ssh launcher@YOURSERVERIP -t 'sudo docker inspect stats.yourdomain.com-daemon-1ee049e0-9ec6-40ba-ac0a-c81da43098e1'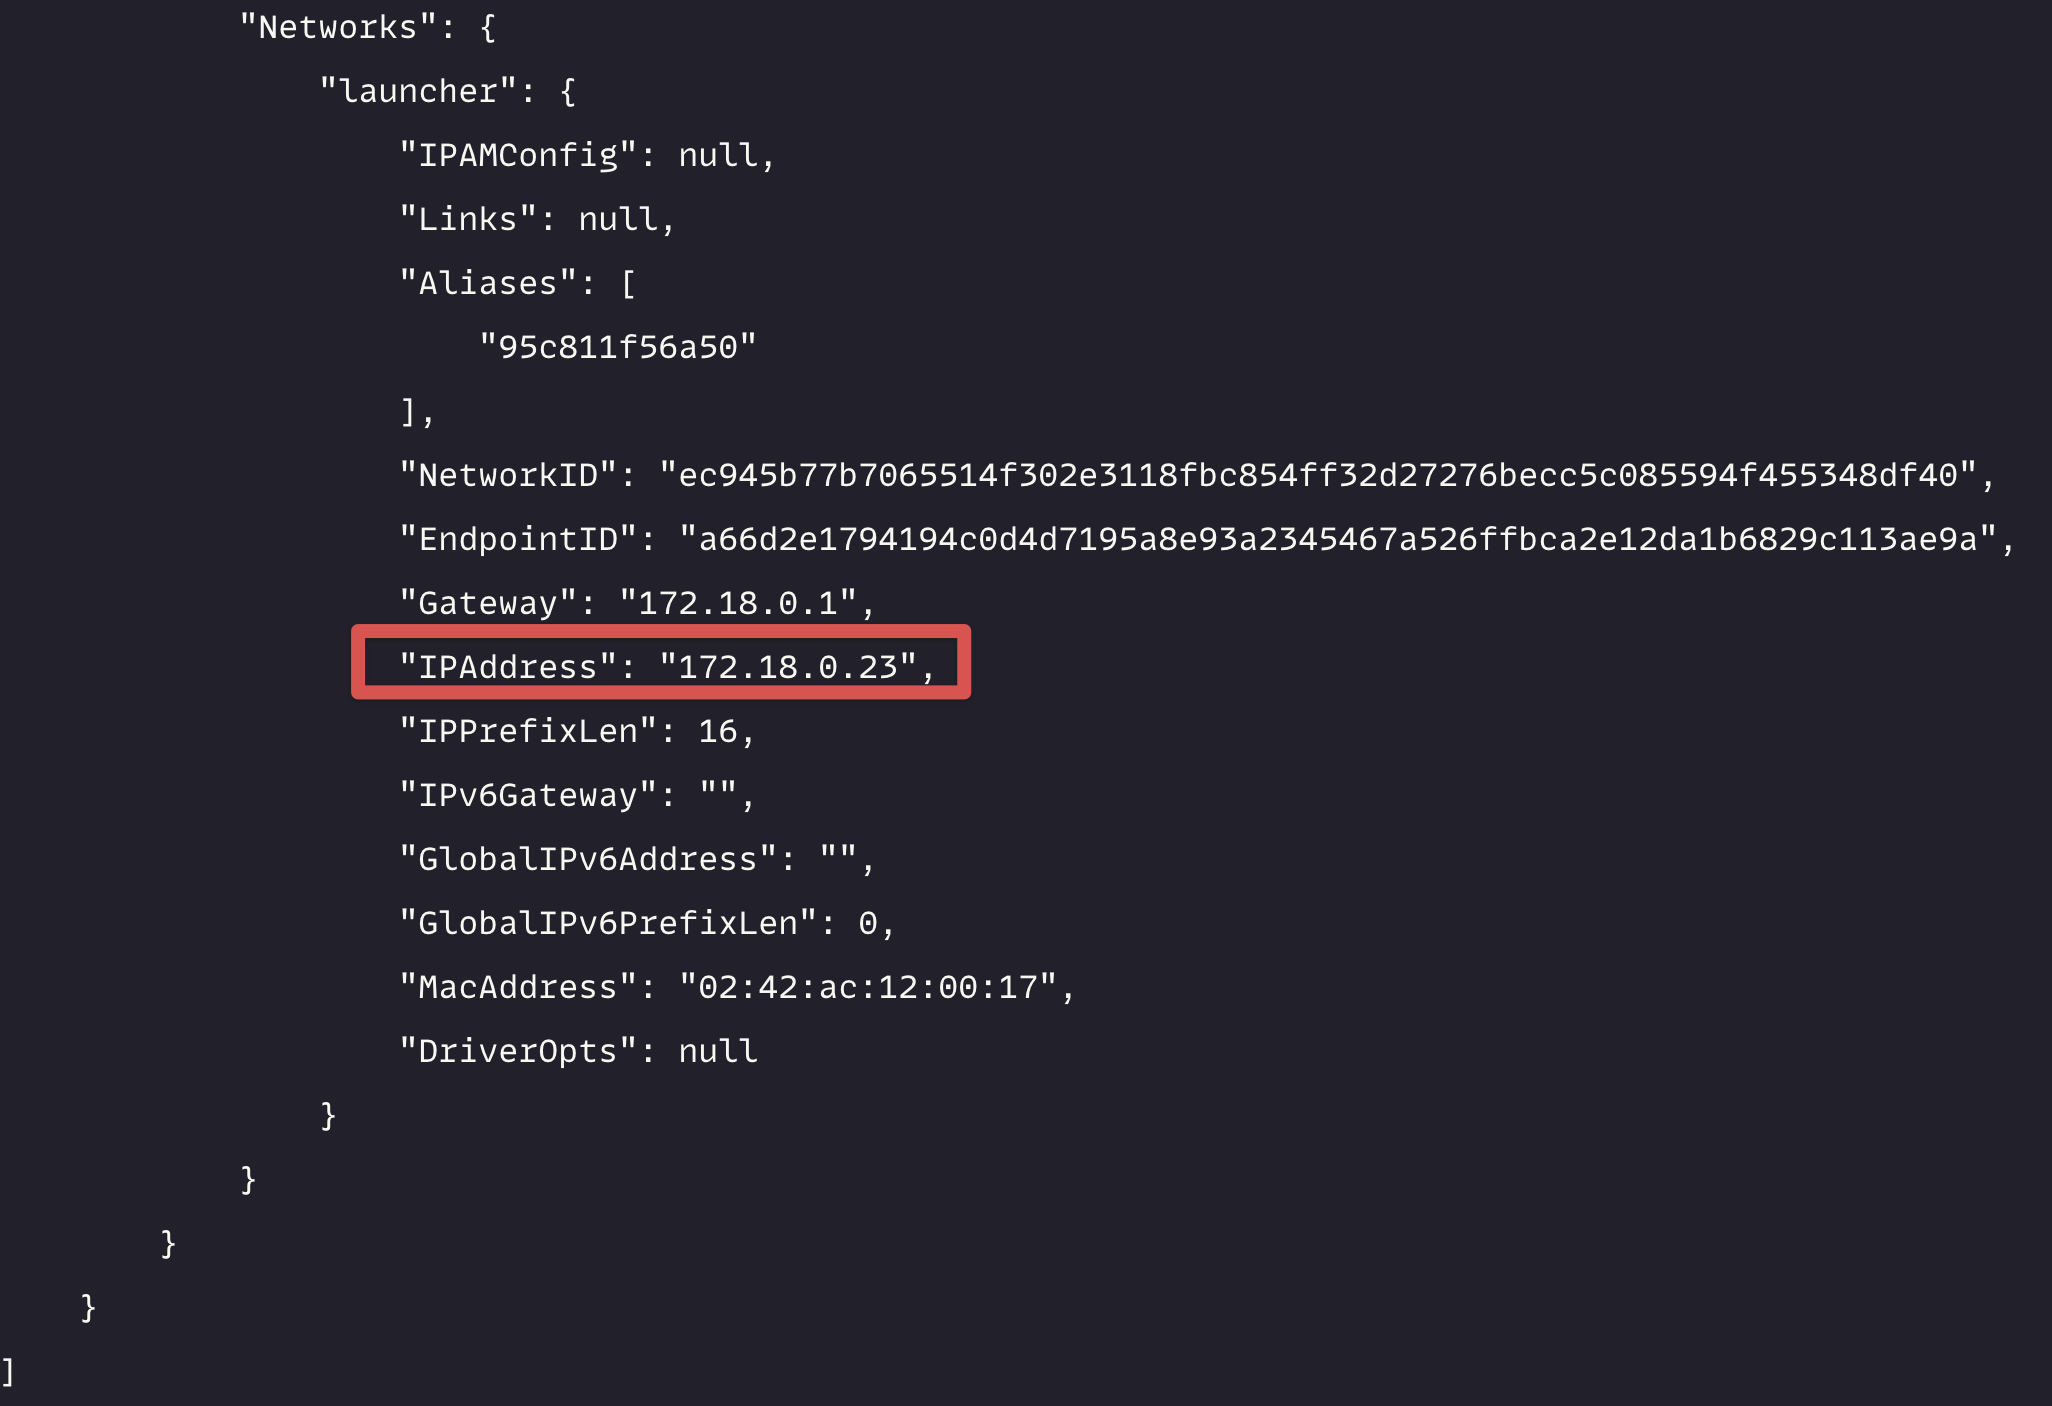
Edit your Nginx site config to proxy the traffic and add this location block as shown below, and redeploy the site.
location / { proxy_pass http://172.18.0.23:3000; proxy_set_header Host $host; proxy_set_header X-Real-IP $remote_addr; proxy_set_header X-Forwarded-For $proxy_add_x_forwarded_for;}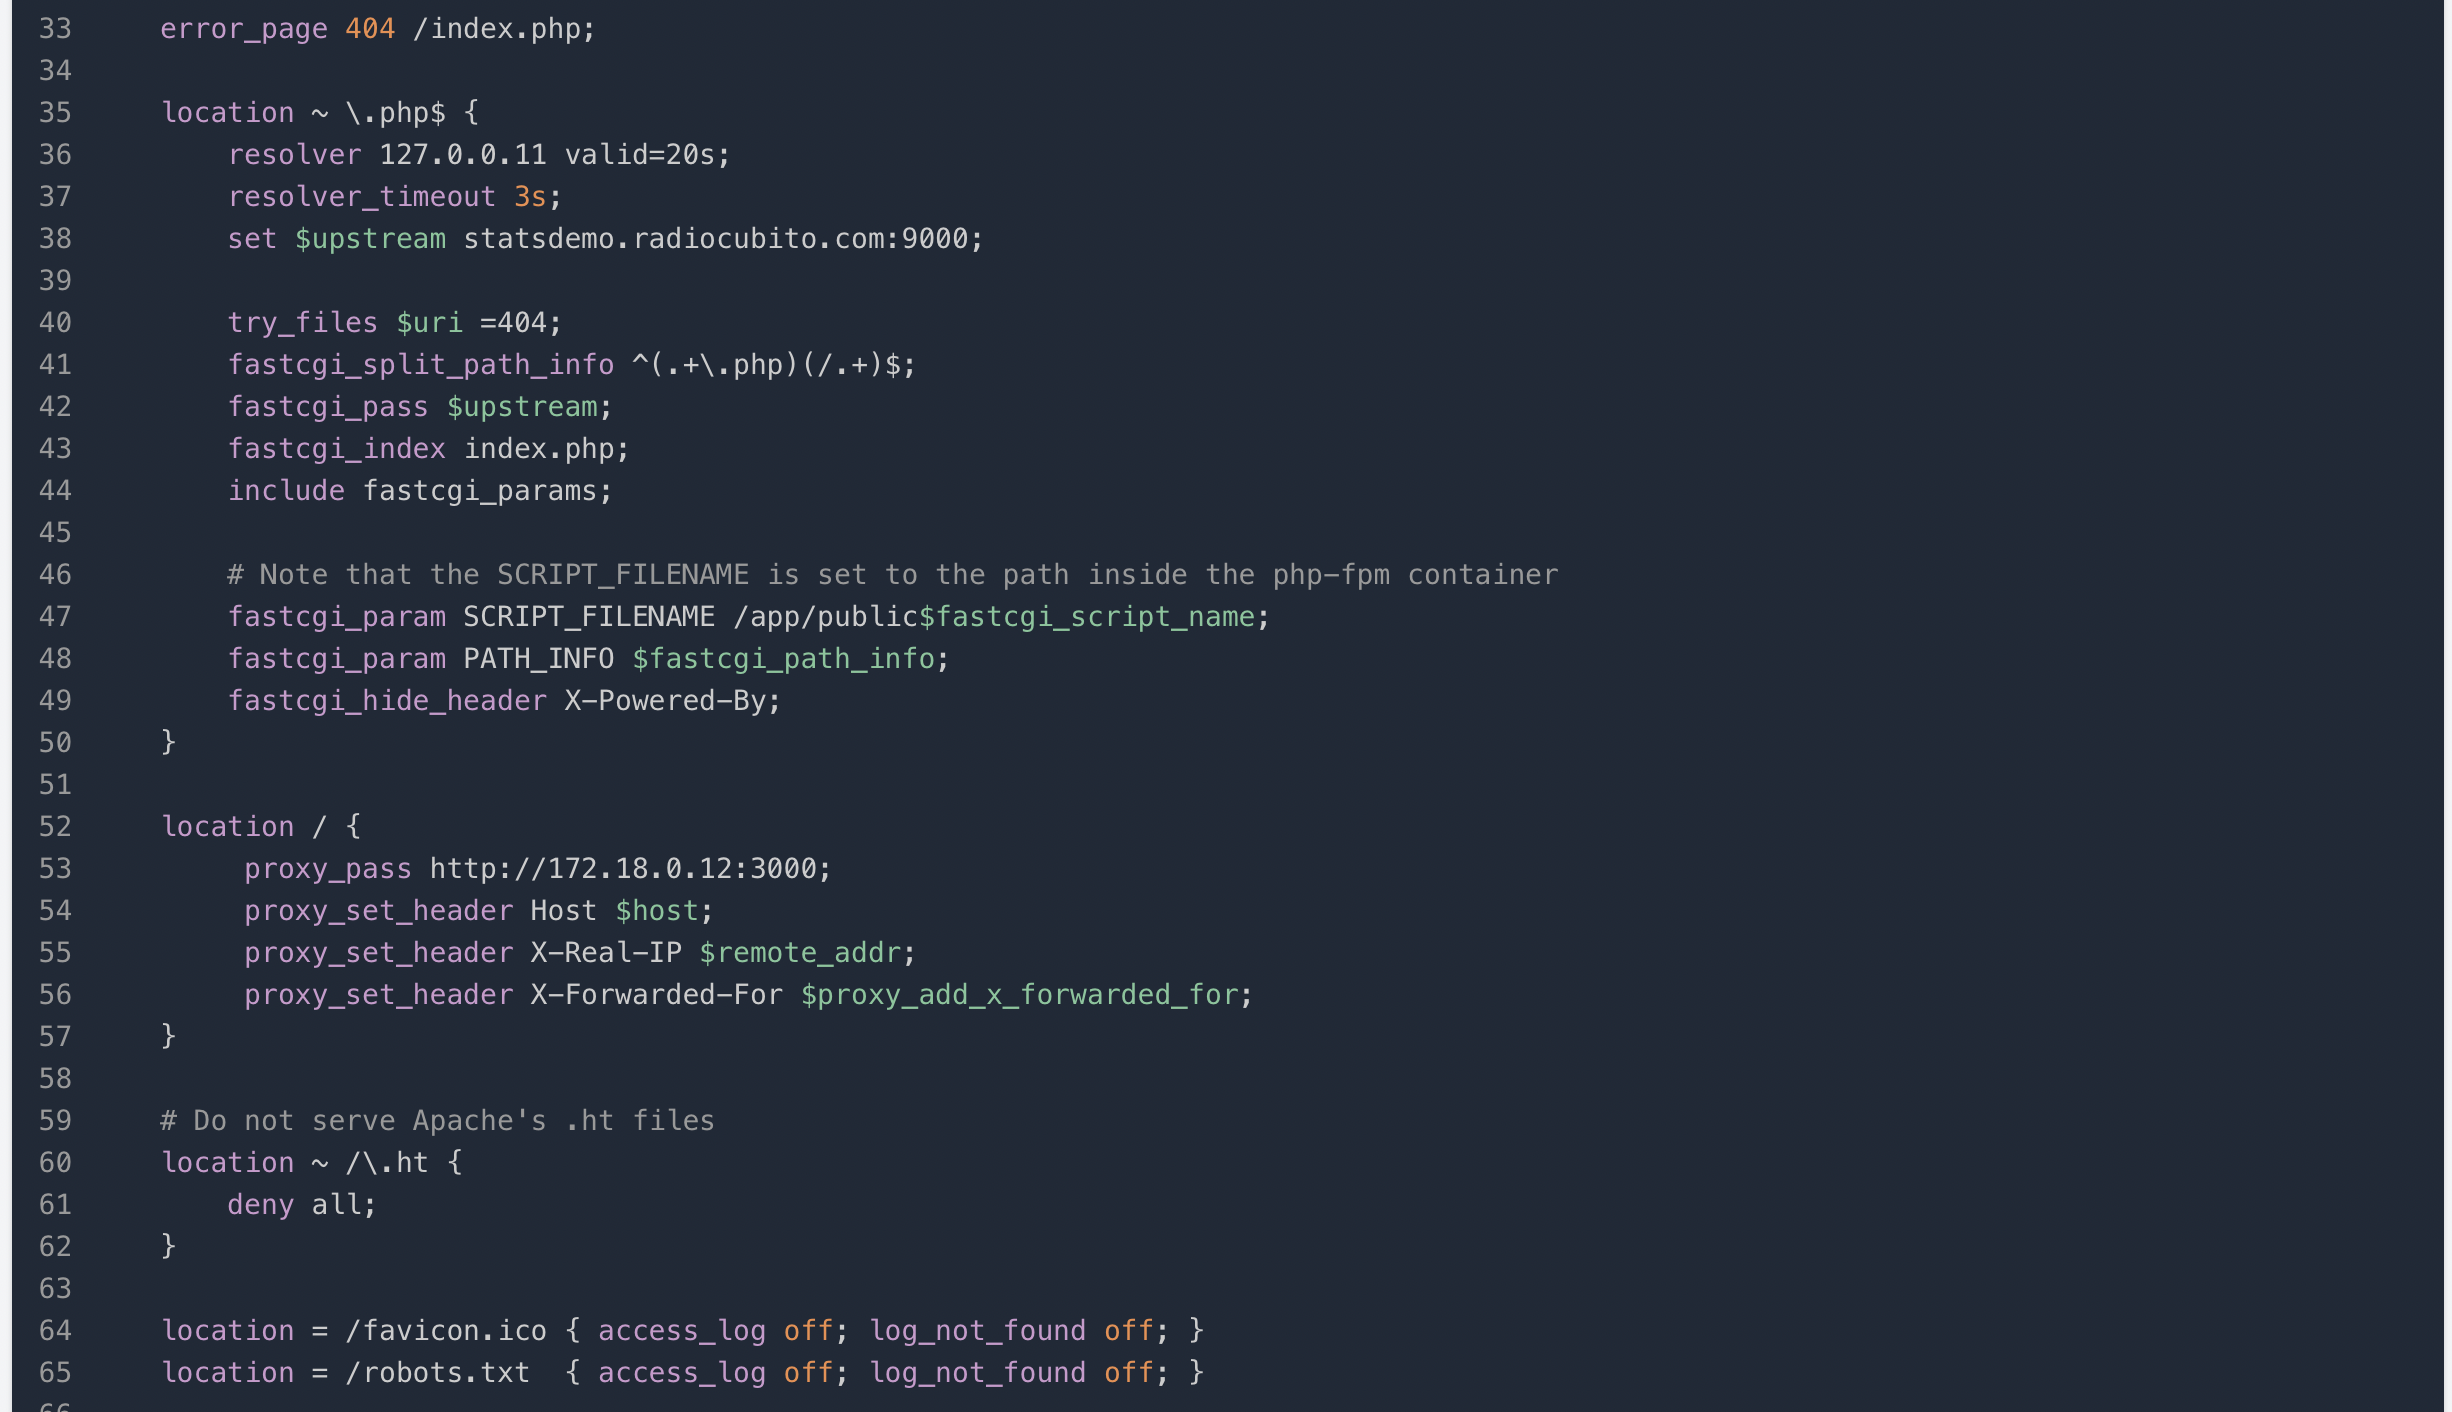
Now Umami is accesible at https://stats.yourdomain.com, and you can log in using admin/umami and change your password.